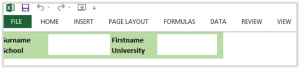
Sometimes we need to create form-like sheets in a workbook, for example where user input is wanted. Presenting a plain grid is bland. Usually cell colouring results in a more attractive form, e.g.
Here is an approach to creating a sheet that behaves like a form, using cell protection:
- Create a form using background colours in prompt cells
- Click on Ribbon, View tab: uncheck …
- Gridlines
- Formula Bar
- Headings
- Select all cells by clicking on the left and above cell A1 (there’s a little shaded triangle in that square)
- Right click on any cell (while they’re all still all selected), and choose “Format Cells”
- In the “Format Cells” dialog, click on “Protection” tab,
- Ensure “Locked” checkbox is checked
- Click OK
- Now, every cell in this sheet is locked, but nothing changes until sheet protection is applied
- Before protecting, select the user input cells (white cells in the example above)
- Right click and choose Protection. This time, ensure that “Locked” is unchecked, so users can enter data
- Protect the sheet:
- Click Review Tab, Protect Sheet
- Uncheck “Select locked cells”
- Enter a password, click OK
- Confirm password, click OK
Test the form. You should find that tab/shift tab or arrow keys will move to next/previous data entry cell. Clicking on prompt (or any other) cells has no effect.
There’s a downside: without a password, it will be impossible to make changes going forward. So, note it where it can be found.